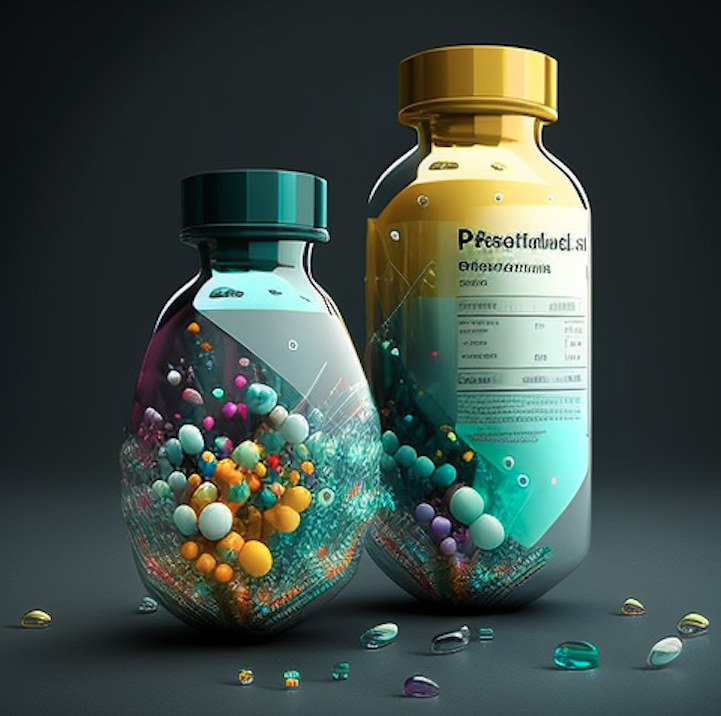
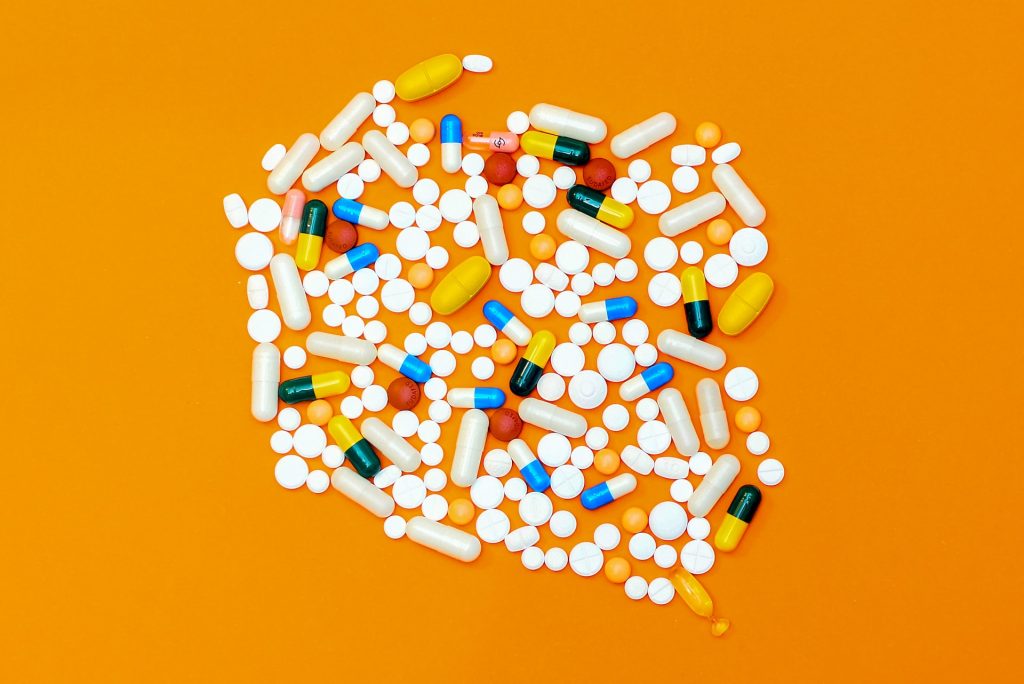
Be like water….

Image with Midjourney

When it comes to corporate packaging design, transparency is key. We always insist on this aspect, specially when on-boarding new teams that are used to a more traditional approach where compartmentalisation of information is common practice.

A packaging design workflow involves multiple stakeholders, including internal teams such as marketing, product development, and design, as well as external partners such as packaging manufacturers, suppliers, and distributors. This complex network of stakeholders makes it essential to have a clear and centralised system of information sharing to prevent errors and reduce risk.

Compartmentalisation vs Transparency

Compartmentalisation is the approach of separating information into individual units or silos, which can only be accessed by certain individuals or groups. This approach can have some benefits, such as providing increased security for sensitive information or enabling clear lines of authority and responsibility. However, there are also significant risks associated with compartmentalisation that can hinder the success of a business or organisation.

One of the biggest risks of a compartmentalised approach is that it can create barriers to effective communication and collaboration. So basically some individuals might not know at one given time what is going on because information is hidden from them. This can lead to a lack of coordination, missed opportunities, and duplicated effort, which can ultimately hinder business growth and success.

On the other side of the spectrum, transparent processes can have many benefits. When stakeholders have access to the same information and there is clarity about what is going on at any time, it can help to identify and mitigate risks early on, before they become significant problems.

Transparency can also lead to greater accountability and trust.

Transparency how?

Transparency for packaging design can be achieved through the use of a centralized AMS tool, such Twona NeXT. It allows all stakeholders to have access to project-related information and updates in real-time, reducing the need for manual updates and reducing the risk of miscommunications.

In addition, transparency can also ensure the final product meets all necessary requirements and standards such as compliance with legal and regulatory requirements.

But how far do we go?

The line between transparency and compartmentalisation can however be difficult to spot. Too much of either and the process will suffer or the risk will be too high.

A good rule to thumb for packaging design processes within pharmaceutical teams follows these key aspects:

  1. High visibility – Being able to understand the status of a project within a complex workflow creates trust, clarity and a sense of belonging by all relevant stakeholders. Keep it open, let all relevant parties see what is happening. Limiting visibility is only advisable when dealing with competing external stakeholders such as multiple design agencies.
  2. Silo the actions – For compliance requirements, it might be needed to limit what each stakeholders can do. This is ensure everyone can fulfil their own actions while reducing the risk of mistakes. For instance, the Design team should be the only one capable of uploading new versions while approvals can only be granted by the Regulatory team.
  3. Train everyone on the entire process – A key component of digitising a process is the training that each stakeholder needs to be part of. For larger teams, it might be wise to split the teams to focus on their part of the process. However, the entire process should be shown to all stakeholders to ensure there is clarity and a complete understanding of what is going on at every moment.
  4. Don’t give access to external stakeholders – When collaborating with external teams such as suppliers, printers and others, it is a good practice to establish a collaboration model that is based on an on-demand basis. This means only when the core team requests something from the external members, the information can be provided or consumed, keeping access to the larger process blocked at all times. This approach reduces risks and simplifies the actions that external stakeholders need to take on your process.

In summary, defining the level of access (both views and actions) when digitising your artwork process should be considered as one of the most relevant task before you get started. Think through it, check with all stakeholders, determine which level of transparency fits your team and remember that silos are the enemy of collaboration.

La sinergia como esencia en el diseño de tu packaging

Midjourney image

Llevo más de 15 años diseñando packaging y si hablo de proyectos como serialización, puede ser que tengas claro a que industria destino mayoritariamente mi tiempo de trabajo, pero no es importante el sector en este caso, ya que trabajar para y con tu cliente no es nuevo para ti.

Ir juntos es un comienzo; mantenerse juntos es progreso; trabajar juntos es el éxito.

Henry Ford

Cuándo y por qué

No, Henry Ford que tanto ha aportado, no fue el primero en hablar de sinergía, ¿o si?, el término se acuño en el siglo XIX aunque hasta finales del siglo XX no se puso de moda en el mundo laboral. En cualquier caso, cuando menciona que el trabajo juntos o en equipo es el éxito, no hay duda de que tenía claro que remar todos en el mismo sentido es mejor.

En este sentido, la creación de sinergias con el cliente es crucial para garantizar el éxito del proyecto. Ambas partes deben estar alineadas a la hora de hacer un proyecto común compartiendo y mejorando la información disponible constantemente, dado que las reglas y/o normativas, las terceras partes como impresores o las necesidades pueden cambiar a lo largo del tiempo.

La comunicación entre el diseñador y el cliente debe ser constante a lo largo del proceso de diseño. Es importante compartir ideas, discutir los detalles y recibir comentarios para poder mejorar el proyecto.

¿Has tenido la sensación de que a veces se acumulan los cambios o notas en un procedimiento a seguir durante demasiado tiempo? ¿Cada cuánto se debe hablar con el cliente para alinear detalles?

No creo que haya una fórmula que aplique a todos los casos, pero estaremos de acuerdo en que tener una reunión una vez al año es insuficiente. Insuficiente porque en el mundo de hoy todo va rápido y todo cambia y si no crees que sea así puede ser que haya que pararse a pensar y estudiar con detenimiento los detalles porque todo proceso, siempre, es susceptible de mejora.

En resumen, el diseñador, como experto en el diseño de packaging, debe actuar como un facilitador que coordina y une a todas estas partes para lograr un proyecto exitoso y para ello que eso ocurra, en relación con nuestro cliente, son vitales ciertos aspectos:

  • Comunicación fluida
  • Recursos compartidos y comunes
  • Trabajar en soluciones en lugar de perseguir “razones”
  • Revisión y mejora continua en los procesos

Además, la creación de sinergias con el cliente también implica estar abiertos a cambios y a adaptarse a las nuevas circunstancias que puedan surgir durante el proyecto. Por ejemplo, pueden aparecer nuevas regulaciones o restricciones que afecten al diseño del packaging.

¿Puede ser el futuro y cercano cambio respecto a los plásticos en la UE una buena excusa para reunirte con tu cliente?

https://www.linkedin.com/posts/twona_recycled-plastic-foods-activity-6993122601833226240-vT5z?utm_source=share&utm_medium=member_desktop

5 key components of a VMP for SaaS

Image created with Midjourney

Artwork management in the pharmaceutical industry is a critical process that requires accuracy and precision to ensure compliance with regulatory requirements and avoid errors in the packaging design that make it to the market and risk a product recall. The artwork management process is sometimes underestimated as it pertains to a non-core activity for brands and manufacturers of medicines and medical devices. However, it can be a critical aspect when facing an audit and even more when such audit is triggered by a product recall.

Multi-tenant SaaS solutions are becoming more popular with pharmaceutical companies, despite the traditional on-site installations, as they offer lower pricing points and less on-boarding hassle (lower financial costs and faster implementation). One key component that is still not fully understood is the fact that validation of on-site custom made solutions differs significantly from the validation approach required for multi-tenant SaaS applications.

The first key component is the Validation Master Plan (VMP) which outlines the validation process. Here we will discuss five key components that must be included in a VMP document for the validation of a multi-tenant SaaS Artwork Management System.

  1. Scope and Objectives – This section needs to clearly define the scope and objectives of the validation process. Let’s dive in. The scope should outline the functionalities of the multi-tenant SaaS solution that will be validated, including any third-party integrations. It is important to define the scope with care and discuss which components need to be included. One aspect that is often overlooked when validation a SaaS application is that in many cases, there will be external services (typically micro services) and infrastructure. These, as long as they only play a servicing role, can be left out of the scope since they are controlled by a third party. The objectives should detail the specific outcomes that the validation process aims to achieve, such as ensuring compliance with regulatory requirements or minimizing the risk of errors or data loss.
  2. Validation Strategy and Acceptance Criteria – The validation strategy should specify the validation approach, including the type of validation to be performed, such as installation qualification, operational qualification, and performance qualification. It is a good idea to include specifically which aspects of the solution will be relevant for the validation. The acceptance criteria should detail the testing methodology, including the type of testing to be performed, such as functional testing, user acceptance testing, and performance testing.
  3. Roles and Responsibilities – This section should clearly outline the roles of the validation team, project manager, system administrator, and any other key stakeholders involved in the validation process. It should also detail the responsibilities of each team member, including their participation in the validation activities and their expected deliverables.
  4. Testing Documentation – The documentation section should detail the testing documentation that will be used and delivered during the validation process. This section should include a list of all required testing documents, including test plans, test scripts, and test cases. It can also outline the testing schedule and the expected timeline for completing each testing activity.
  5. Change Control – The final component of a VMP document should detail the procedures for making changes to the multi-tenant SaaS solution after the validation process is complete. It should include a list of change control forms (or other methods for documenting the required changes), detailing the requirements for documenting changes, and the process for reviewing and approving changes.

The VMP document is an essential tool that will guide you through the validation process.There is however not a single way to create it. Depending on your scope and criteria, the contents of the document can change dramatically. One critical aspect is choosing carefully which components of the application you are going to validate. For applications that rely on external infrastructure or services, specially when managed by third parties, it might prove difficult to get all the components required to validate those services. Our advice is to focus on your application and ensure that all third party infrastrucure and services are only services and do not represent a core data processing unit of your set of features.

If you get the VMP right, the rest of the validation will be much more approachable than having to come back to the VMP to make changes. Spend your time wisely, get the VMP right and your validation will be a breeze.

Want to know more key differences between a traditional VMP and a VMP for a SaaS solution, let us know!

Version 1.1….version 1.1_new….version 1.1_final

Created with Midjourney

Document versioning is an essential aspect of packaging design, as it ensures the accurate tracking of changes made to the design from one iteration to the next. If you have ever received or sent an email with a subject or a filename that reads something along the lines of “Version 3_final_final”, then keep reading.

Version Control

Version control is the first aspect of document versioning in packaging design. It involves keeping track of all changes made to the design, including modifications to text, graphics, and other elements. This helps ensure that all stakeholders can identify the latest version of the design, reducing the risk of confusion and errors. When I say identify, I mean it. It is not just about downloading the right version, but about being able to uniquely identity a file by just looking at it.

By using version control (keep on reading, we get to the main course soon), the complete creation and modification process is properly tracked. This is particularly critical in highly regulated environments such as packaging design for pharmaceutical companies.

Version Numbering

Version numbering involves assigning a unique version number to each iteration of the design. It is not really relevant HOW the number is defined. Some companies prefer to use a combination of numbers and letters (Version 1 revision A, Version 1 revision B), while others prefer a more straightforward model based on integers (Version 1, Version 2). We do prefer a mixed approach with 2 versioning digits: Version.Subversion. This allows us to track easily major revisions with the first digit and feedback rounds with the second (1.1, 1.2, 2.1, 2.2). The version number NEEDS to be included in the design itself in a way that can be printed. This allows port print identification of design versions which will be critical in the event of a product recall or an audit.

By using version numbering, designers can easily identify which version of the design they are working on, reducing the risk of errors and ensuring that everyone is working with the same version. This also helps with traceability, as the version number can be used to track changes and identify the origin of any issues that may arise.

Version History

It is also important to keep a record of all changes made to the design, including who made the change, when it was made, and why it was made. The link between the version history and the design itself is made via the version number. For every version number, there has to be a historic record of changes and change requests. If you rely on emails, papers or phone calls for this…..you should read this.

Version history is critical at the Quality Control stage or the workflow when someone needs to validate that the changes made are what was expected and nothing else was introduced by mistake.

I don’t wanna

Many teams are reluctant to implement a printable version control system. This can be due to fear of being perceived as a team that needs more than one iteration to get it right. However, when multiple version 1s exist on a given system (email, shared folders, wetransfer) the risk of printing the wrong file becomes a very serious concern. No auditor in its right mind would ever pass a packaging company that does not implement version control from conception to printing.

We make more rounds to avoid mistakes…the Fallacy

Midjourney image

Have you ever heard from a client that the reason they make so many rounds or checks (and they seem to be proud) is to avoid mistakes in the final product?

I translate this as “reducing the probability of making a mistake” in the design of the packaging.

Well….let me tell you this:

THEY ARE LYING TO YOU

Anybody that can do statistical analysis

Designing and creating designs for packaging materials, specially for food, retail and pharma, is a complex process that involves multiple rounds of designing, checking and refinement. One might expect that with each additional round of design and checks, the probability of making a mistake decreases. However, this idea is counter-intuitive and exploring the math clearly shows how more rounds of changes do indeed lead to a higher probability of making ANY mistake. Let’s check it out, it is not too complex.

The Setup

Let’s say that the probability of making a mistake when implementing a design is 1/10, or in other words, 10% of the times a designer will make a mistake. It does not matter if this number is realistic or not. More experienced designers will make mistakes less often than more experienced ones. The numbers do not affect the calculation and are only used to showcase the scenario.

Let’s also say, that we want to know that is the probability of making ANY mistake when making 1 design round versus 4 rounds of changes. In the first case, for a single round, the probability of making a mistake is set at 10%. For the second case, the probability of making ANY mistake after 4 rounds, we need a bit of math. Don’t be afraid, it is simple.

The Proof

The probability of NOT making a mistake on any given design round is 1 – 1/10 = 9/10 (so 90%). The probability of NOT making a mistake on all four consecutive design rounds is (9/10)^4 = 6561/10000 (so 65%).

To find the combined probability of making ANY mistake, we subtract the probability of NOT making a mistake on all four consecutive actions from 1:

1 – (9/10)^4 = 1 – 6561/10000 = 3439/10000 = 0.3439 = 34.39%.

So the combined probability of making ANY mistake if you execute 4 consecutive design rounds is 34.39%.

That is more than 3 times the probability of making a mistake on a single round. This is key, so clients can understand that a well-defined brief and instructions improve the odds of nailing the design in the first round, which then reduces the probability of making a mistake on further design rounds.

Fell free to send this proof to your clients so they start sending better briefs (including accurate technical specs).

Por qué exigir documentos técnicos correctos para el diseño de tu packaging

Midjourney image

A la hora de diseñar un packaging hay tres pilares fundamentales:

Guideline donde se describen las reglas corporativas respecto, colores, proporciones, posición de elementos y logos, en definitiva la esencia de nuestra organización.

Los textos a implementar, generalmente un documento word idílicamente revisado por el departamentos de asuntos regulatorios o marketing según el tipo de producto.

El documento técnico aportado por el fabricante o impresor donde se definen las medidas, tipo de material, grosor y reglas en códigos visuales.

Photo by Sigmund on Unsplash

Centrándonos en el documento técnico, en primera instancia no debería ser un problema dado que el impresor, debería aportar un documento con sus reglas para que el diseñador implemente los textos necesarios con la esencia del cliente.

Cuando me preguntan que hago en mi trabajo me gusta decir que hago puzzles, y para ello las piezas deben encajar, ¿verdad?.

Cómo debe ser un documento técnico

Los detalles en estos documentos son esenciales para garantizar que el diseño y la producción del envase se realicen de manera eficiente y efectiva. Después de más de 20 años produciendo packaging con miles de modelos el proceso se puede hacer tan complicado como poco claro sean sus reglas además de las muy comunes omisiones de información por lo que básicamente debe incluir solamente cinco detalles bien definidos, sólo cinco:

1.- Escala 1:1, es decir, una escala correcta sin proporciones incoherentes. Del mismo modo ya se ven poco, pero no hace mucho podías encontrar planos hechos con el famoso Autocad con diseños mal escalados e inservibles para su uso y edición en herramientas básicas de diseño como Illustrator o Indesign.

2.- Especificaciones respecto al material, incluyendo gramaje, grosor, si es un material reciclado y siendo exquisito una ayuda visual para sabes si es un papel continuo en rollo o si es tipo cliché entre.

3.- Límites y máximos, donde debe especificarse detalles como los márgenes, zonas de impresión o por el contrario zonas libres de texto donde no debemos incluir información dado que dicha zona tiene una reserva para incluir los datos variables o es una zona de plegado, por ejemplo. Otros detalles serían la posición del braille, localización de las etiquetas para garantizar la inviolabilidad, los datos variables como loteado o fecha de caducidad y posición de los datos de la famosa serialización.

4.- Reglas respecto a los códigos visuales, en éste apartado hay mucha variedad como laetus, códigos 128, datamatrix, collating marks (perdón, no conozco la acepción en español). En cualquier caso todos estarán bien definidos si se define: posición, orientación, dimensión y color.

5.- Colores, definiendo aspectos como el máximo de colores posibles, especificar si debe tener un color específico como negro muy común en un prospecto. La excelencia en éste apartado sería tener una nomenclatura de los colores técnicos, es decir, lo contrario a recibir un documento en cuatricomía (CMYK). ¿Es mucho pedir un documento con colores bien estructurados?. Si recibes de tu impresor un documento técnico con colores con una nomenclatura como la siguiente: dimensions, cutting, creasing, guides, perforating, Text Area, Text Free, Ink Free, solo me queda aconsejarte que felicites a tu impresor y que sigas trabajando con él todo lo que puedas.

Para terminar, exige a tu impresor que cumpla con éstas cinco pautas, la excelencia esta en la búsqueda de la mejora continua, de ésta manera te vas a ahorrar mucha frustración cuando te llegan una y otra vez rechazos de tus materiales incurriendo en versiones innecesarias y los nunca deseados retrasos sin mencionar la gran importancia si hablamos de nuevos lanzamientos.

Are you measuring your team’s performance?

Image by Midjourney

Key Performance Indicators (KPIs) are a set of metrics that help organizations evaluate the success of their strategies and models, and monitor their progress towards achieving their goals. In the context of a design team working on packaging materials for pharmaceutical products, KPIs are particularly important as they provide valuable insights into the team’s productivity, efficiency, and effectiveness. They help track your chosen workflow and allow you perform a continuous improvement programme. By tracking and analyzing KPIs, the team can identify areas for improvement, make more informed decisions, and achieve better results.

There are many KPIs that can be used to evaluate the performance of a design team. Different organizations work under different predicaments and models, which can influence the overall objetives: reduce time-to-market, reduce number of reworks, minimise risk of errors, etc. Three of the most common design KPIs are: the number of iterations required before approval, the time spent in each stage of the workflow, and the number of processed jobs per team member.

N versions before Approval

The number of iterations required before approval measure the number of times a design has to be revised before it is finally approved. A high number of iterations can indicate that there is a problem with the design process or that the team is not communicating effectively with stakeholders (if you are experiencing this, maybe you want to consider THIS article). It can also be a sign of a lack of clarity in the design brief, an unstructured design process, a lack of relevant SOPs and documentation and a wide range of other design-process maladies.

Time to move on

The time spent in each stage of the workflow, measures the amount of time the team spends on each stage of the design process, from conception to final approval. It allows you to zoom in on each step of the process and see what is really going on. This information is valuable as it helps to identify bottlenecks in the workflow. Additionally, the time spent in each stage can provide insights into the team’s capacity, allowing them to plan more effectively and allocate resources more efficiently.

What’s your workload

The number of processed jobs per team member, measures the productivity of each team member by tracking the number of jobs they complete in a given time period or in certain stages of the workflow. This information helps to identify individual strengths and weaknesses, which can then be used to optimize the allocation of tasks within the team. It can also provide insights into the workload of each team member, helping to ensure that they are not overburdened, which can lead to burnout and decreased productivity. It is important to filter this information with the right parameters, not all jobs are the same nor they take the same amount of time and resources. Filter wisely, one designer processing 3 multi language packs per day might be more efficient than another who moves around 10 simple jobs.

Kaizen baby, kaizen

KPIs are not only useful for evaluating the performance of a design team but also for setting a starting point for process improvement. By regularly tracking and analyzing KPIs, the team can identify areas for improvement and make informed decisions about how to optimize their processes and improve their performance. This is not only valuable for in-house processes, but also for evaluating external stakeholders. If your design efforts are outsouced, you can gain valuable insight into their effectiveness. If your customers are giving you a hard time with delays on approvals, hard KPI data will be valuable for a hard discussion with them about meeting deadlines.

Are you measuring your design team performance? If you said no, you need to take some time to think about it. If you said yes, the follow up question is: how exactly are you tracking the progress?

The truth and nothing but the truth

Image by Midjourney

Having a single source of truth is a key aspect of effective design management, particularly when it comes to packaging materials and more so in highly regulated environments where a recall is akin to….well….the devil. When multiple stakeholders play a key role, it’s essential to have a clear and centralized system for managing the design process to ensure consistency, accuracy, and efficiency.

Centralised Source of Truth

A centralized source of truth refers to a single, authoritative repository of information or data that serves as the authoritative reference for all stakeholders involved in a project. In the context of managing design files, a centralized source of truth refers to a centralized system or platform where all design files, specifications, and other relevant information are stored, managed, and updated. This system serves as the authoritative reference for all stakeholders involved in the design process, including designers, regulatory affairs specialists, quality managers, marketers, printers, production specialists and other decision-makers.

The purpose of having a centralized source of truth is to ensure that everyone involved in the project is working with the same information and that everyone has access to the latest version of the design files. This helps eliminate confusion and miscommunication and ensures that everyone is working towards the same goal.

A centralized source of truth also makes it easier to track changes and maintain version control. All updates and changes to the design files are made in one place, making it easier to keep track of who made changes and when. This helps reduce the risk of errors and inconsistencies and ensures that everyone is working with the latest version of the design files.

Three key aspects

Here are three of the most important aspects of having a single source of truth in this context.

  1. Collaboration and Coordination: Having a single source of truth makes it easier for all stakeholders to collaborate and coordinate on the design process. Instead of having multiple versions floating around in different folders or email attachments, everyone has access to the same information, making it easier to track changes, communicate with each other, and ensure everyone is working in sync.
  2. Version Control: In a decentralized system, it can be challenging to keep track of which version of the design is the most recent and accurate (have you ever seen version 1, version 1_new, version 1_new_new? kind of thing). This can result in errors and inconsistencies in the final product. Having a single source of truth allows for accurate and safe version control and ensures that everyone is working with the latest information.
  3. Traceability and Auditability: Having a centralized and well-organized system for managing the design process helps ensure that all decisions are properly documented and can be traced back to the original source. This is important for ensuring accountability and maintaining a clear record of the design process. In the event of a problem, it’s much easier to determine who made a decision and why, which can help minimize the risk of costly mistakes and protect the company from liability. If you work under highly regulated agencies (pharma, food, etc) this is not even a nice to have, but an absolute must. If you are managing files using sharepoint or local folders…..God had mercy on your soul if you ever have to undergo an audit.

Risky Business

The biggest risk of not having a single source of truth and relying on shared folders or decentralized systems is the potential for a failed design to make it to the market. This can result in negative consequences for the company, such as lost sales, decreased brand reputation, and increased costs for correcting the problem. Bonus risks and costs if you are dealing with a pharmaceutical product that can kill a patient. Having a centralized and well-organized system in place helps minimize this risk by ensuring that everyone is working with the same information and that the design process is properly documented and auditable.

If you are still working with Excel files and local folders….well…..I mean…..its 2023…..you don’t have to do that anymore.

Ingredient information on food packaging

Image generated with Midjourney

There are some basic elements that always must appear on a food product’s label/packaging:

  • Name of the product and manufacturer’s details
  • Ingredients
  • Weight, calorie count, servings & serving size
  • Nutritional information
  • Freshness – is it a fresh product, recently produced or harvested or how has it been preserved, and what is its best-before date
  • Whether it is organic or not and does it have any GMOs – generally modified organisms – present in the product?

When it comes to the ingredients, these are expected to appear listed from highest to lowest according to their amount, but there is not always a clear explanation on when the percentage of the ingredient needs to be shown on the label. This, however, is of high importance for consumers so they can make informed decisions about the products they purchase and consume.

This information is typically required by regulatory agencies such as the European Food Safety Authority (EFSA) in Europe or the Food and Drug Administration (FDA) in the United States, to ensure that consumers are provided with accurate and relevant information.

But why is this so important?

Having the ingredient percentage on food labels helps consumers understand the nutritional content of the product. For instance, knowing that a product contains a high percentage of sugar would be useful for those who are trying to limit their sugar intake.

More importantly, information about the percentage of whole grains or allergen substances such as peanuts or gluten can also be critical for individuals with dietary restrictions or allergies.

In addition to nutritional and allergen content, the percentage of ingredients used can also impact the overall quality and taste of the product. Take for instance a product that contains a high percentage of filler ingredients. Its flavour or texture may differ from that of one that contains a higher percentage of high-quality ingredients.

By providing information about the percentage of ingredients used, consumers can make more informed decisions about the products they buy and determine which products best meet their needs and preferences.

Furthermore, when a product’s packaging uses an image that depicts a certain ingredient, the label must clearly indicate the percentage of that ingredient used in the product. This is because images can be misleading and give consumers the impression that a product is something that it is not really. Imagine that you place a picture of juicy strawberries on a carton of strawberry yogurt, but it mostly originates from a concentrate juice that contains only a small percentage of fresh strawberry. By indicating the percentage of the ingredient used on the label, the consumer is given a more accurate representation of what they can expect of the product.

Products where, unless the percentage of an ingredient is mentioned, a user could fail to distinguish them from other foods, must certainly have it showing in their labels.

Another reason for the requirement of ingredient percentage information is to ensure that products are properly labeled and marketed. If the ingredient appears in the name of the product, very much so! For example, if a product claims to be “whole grain,” , “light” or “low-fat”, the label should indicate the percentage of whole grain ingredients used/ percentage of fat or calories that are reduced so consumers can be sure they are getting the product they expect.

As seen, there are various reasons – regulatory and not – why including information on the amount of each ingredient in your product is relevant. The fact that some of these are not mandatory, makes it a hard decision sometimes as your product label are in general already quite full, and the font sizes are already small so adding more information only makes it harder. However, the decision to include them can have a competitive advantage for you when customers are comparing seemingly similar products. Nowadays there are alternative to traditional labeling to help you, and your designers, be more creative about what comes where in the packaging – think of peel labels, or QR codes, which can take some of the load of the information.

Deciding what stays visible and what is “hidden” behind those techniques is a different matter… how would you make that decision??

Relevant links

Post that inspired this article

European Food labeling rules

Packaging perspective correction (with your phone)

Perspective Correction Algorithm for Cell Phone Photography

Image with Midjourney

Cell phone photography has become increasingly popular in industrial and business applications in recent years, with the increase in resolution, accuracy and connectivity. One of the biggest challenges with cell phone photography when applied to Quality Control is correcting the perspective of an image. This is especially important when comparing a master design file with a printed a packaging material. A perspective correction algorithm can be used to address this issue.

The perspective correction algorithm is a software-based solution that adjusts the perspective of an image to make it look as though it was taken from a straight-on angle (thus, correcting the perspective distortion). This is achieved by identifying key points in the image, such as the corners or the edges of a packaging material, and adjusting the image to align these points. The process follows a set of determined steps:

  • Extract key points on both the design and the photo
  • Match those points to identify corredpondance
  • Calculate the required transformation
  • Modify the photography according to the calculated parameters to obtain a corrected image

The use of a perspective correction algorithm is especially important when overlaying a cell phone photo on a packaging design. This can be particularly useful when comparing a master design file (the artwork) with a photography taken with a cellphone of the printed material before it goes into full production. Being able to identify wether the approved master artwork corresponds exactly with the printed material helps reduce (or even eliminate) the risk of printing a packaging material from an un-approved or modified version. This sometimes happens when a stakeholder takes the liberty to modify an artwork for technical reasons and by mistake, something else goes amiss.

Content-based quality checks on printed packaging are crucial to avoid product recalls.

Every Quality Person in the world

There are industrial applications that involve in-line high resolution cameras to compare printed materials with master files. However, they are usually applied for Quality Control on already approved files. Therefore, being able to check before giving the green light for production on a print proof file has tremendous value, specially for highly regulated environments.

If you want to know more about how the perspective correction algorithm works, don’t hesitate to get in touch and we will be happy to chat with you. In the meantime, just to prove this is possible and valuable, you can see how the algorithm works with a really difficult case.